Signed in as:
filler@godaddy.com
Signed in as:
filler@godaddy.com

Installing a Vapor Trapper is quick, easy, and makes an instant difference in eliminating fuel odors. Whether you're working on a classic car, ATV, boat, or daily driver, you don't need special tools or advanced skills - just follow this step-by-step guide.
Step 1: Gather Your Tools & Parts
Step 2: Choose the Right Mounting Location
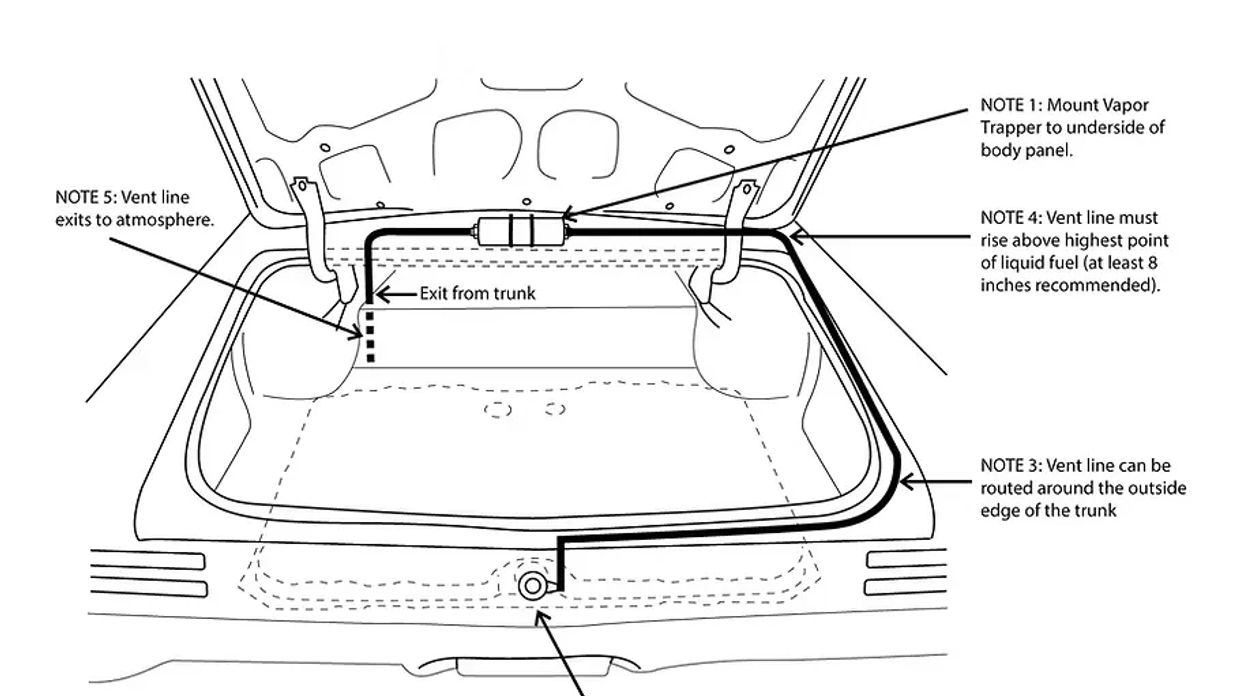
Choose a place preferably as high as possible above your fuel tank. Make sure it's away from excessive heat sources or moving parts. We suggest having a minimum of 8" clearance if possible. On most cars, under the rear window package tray is an ideal location as it keeps it as high as possible to prevent liquid fuel from getting into the Vapor Trapper charcoal media inside.
Step 3: Install the Canister
Step4: Connect the Vent Line
Installing your Vapor Trapper™ is quick and straightforward. On this page you’ll find step-by-step instructions, and below you will find real installation photos, and videos straight from our YouTube channel to guide you through the process. Have questions? Click the button below to contact us—we’re always glad to help.
Are you tired of fuel odors in your garage? Two Guys Garage introduces the Vapor Trapper™. Check out how this small but powerful device eliminates fuel smells and how simple it is to install on a classic Mustang.
Eliminating Garage Gas Fumes with the Vapor Trapper
Customer Installs Vapor Trapper on a '69 Chevelle